Making of: 427 Bulb Sign
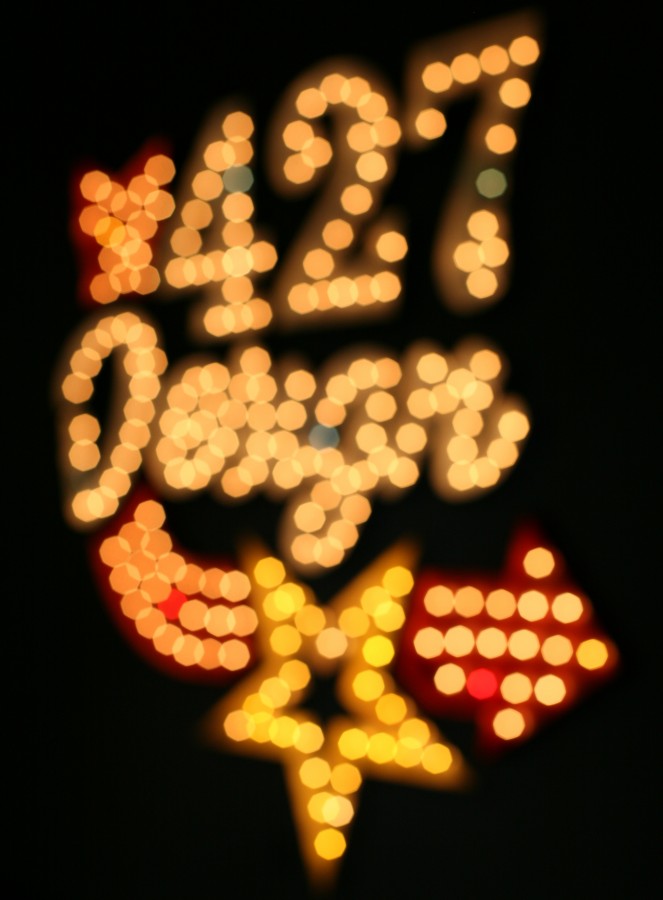
If you came to our 7th annual Open House on April 26th, you may have noticed a new addition to our office walls: a huge, lighted marquee sign consisting of our name, star logo and a curving arrow (it’s kind of hard not to notice).
When we first picked our Open House theme nearly a year ago (Lucky No. 7/Vegas) we almost immediately decided that we wanted to make a sign. Few things scream “Las Vegas” more than large, lighted signs, but we knew that we’d want something that could not only fit into our theme, but remain in our office for years to come. Our creative director, Justin, volunteered to take on the enormous task of building the sign, and one of our designers, Alexandra, designed it.
Here’s a peek into the process:
Research
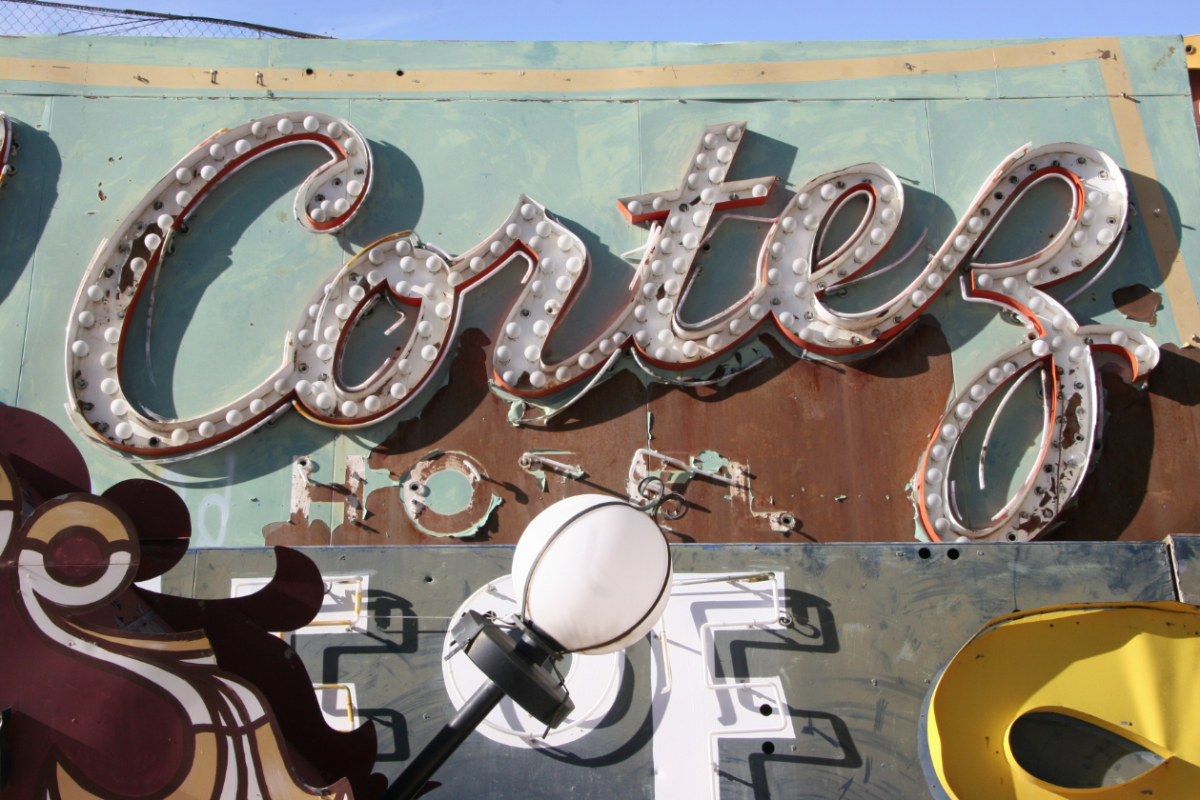
Most of our projects begin with extensive research. We had toured the Neon Sign Museum‘s boneyard on a trip to Vegas a few years back, so we started combing through the photos we took there for inspiration. We knew we wanted an arrow — and our logo was a given — but choosing the right typefaces and styles for the “427 Design” part was tricky.
We didn’t want the sign to feel too gimmicky or too themed; we wanted a classic and vintage look that would feel at home in our office.

While Alexandra was busy formulating the design, Justin was researching the construction end of the project. We initially considered making the sign from metal, but we quickly realized that wood was the most feasible option.
We knew we would be using bulbs (instead of neon), and we loved the dimensional quality of the signs with raised sides.
Design

We designed the sign as vector art in Illustrator. We bought strings of simple, clear, round bulbs and measured one — after the final design was agreed upon, we took the same file and plotted out the placement of each light bulb.
Laser-Cutting
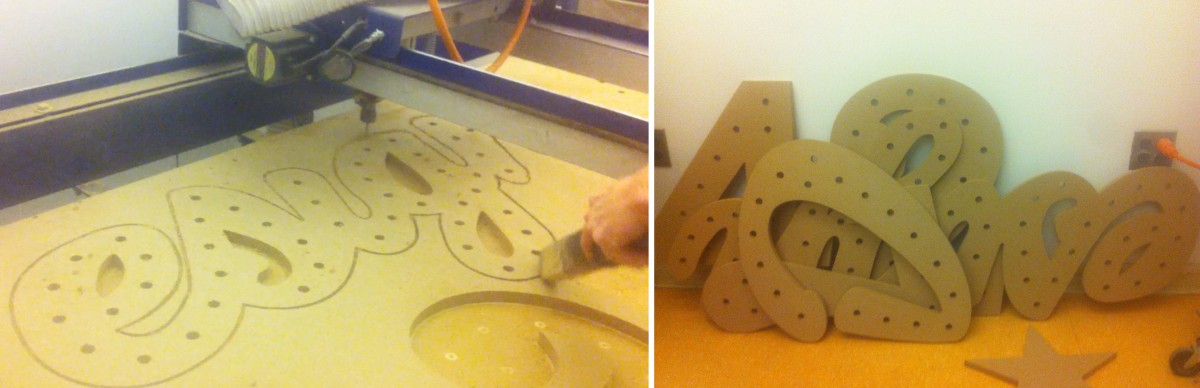
With the final plans in hand, Justin enlisted the help of Brad’s son Bryan. Bryan and Justin traveled to the Art Institute of Pittsburgh (their Alma Mater) to use their laser-cutting table. The bases for each section of the sign were cut from MDF, and a hole for each bulb was drilled.
This saved a lot of time and potential headaches, and ensured that our sign was as close to the original design as could be.
Adding Dimension
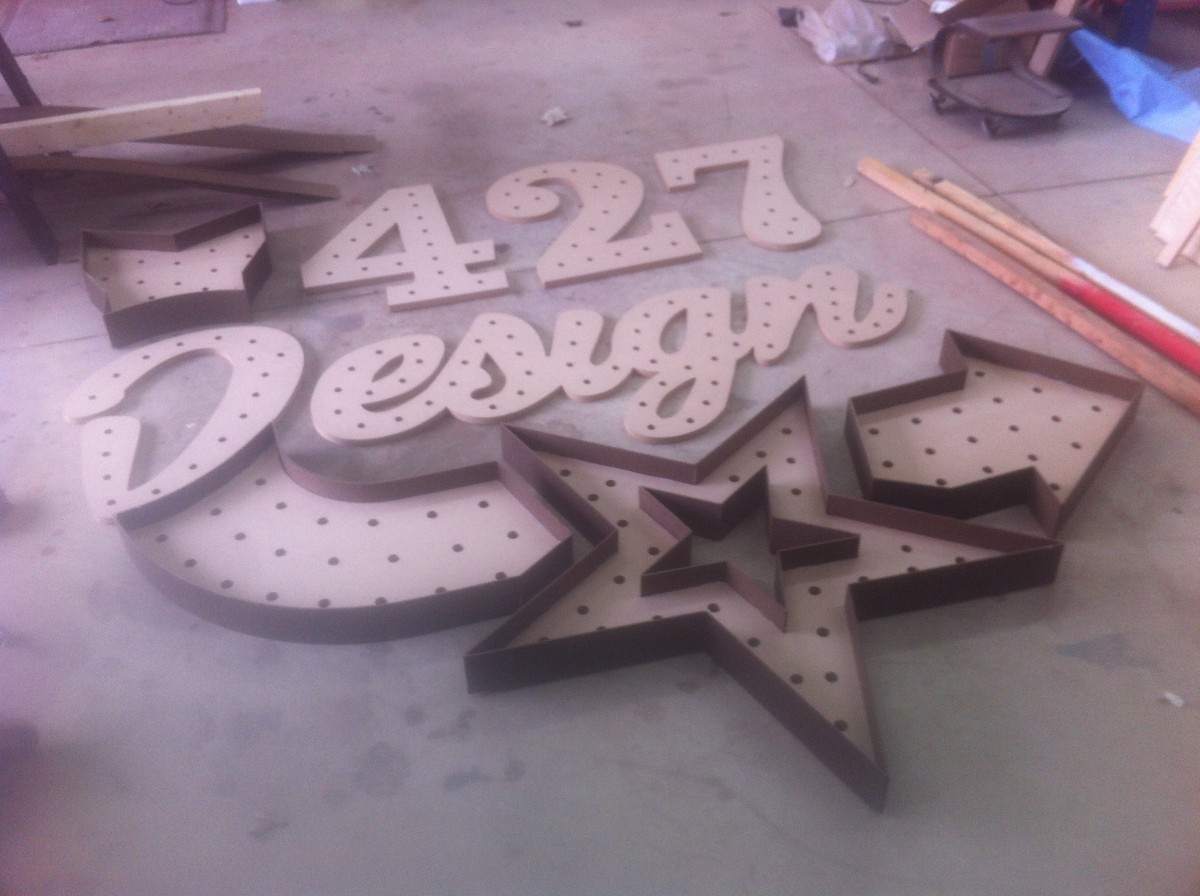
After the individual pieces were cut out, Justin began adding dimension to each one with strips of masonite. The straight sides were relatively simple: a few nails, some glue and a very precise measuring.
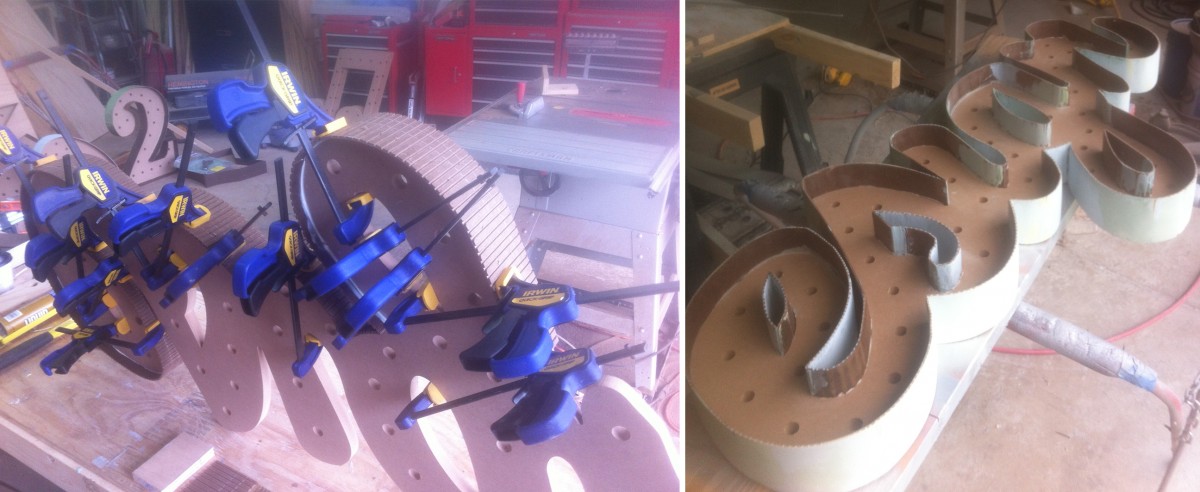
The curves were a different story. In order to get the masonite around the tight curves, he had to notch each strip so it wouldn’t break under the tension. After nailing and gluing the strips, he filled in the notched areas with body filler (thanks USC!) and sanded each one smooth.
If this sounds fun to you, let me introduce you to Justin’s fingerprints, which reappeared recently after being sanded completely smooth.
Faking Metal
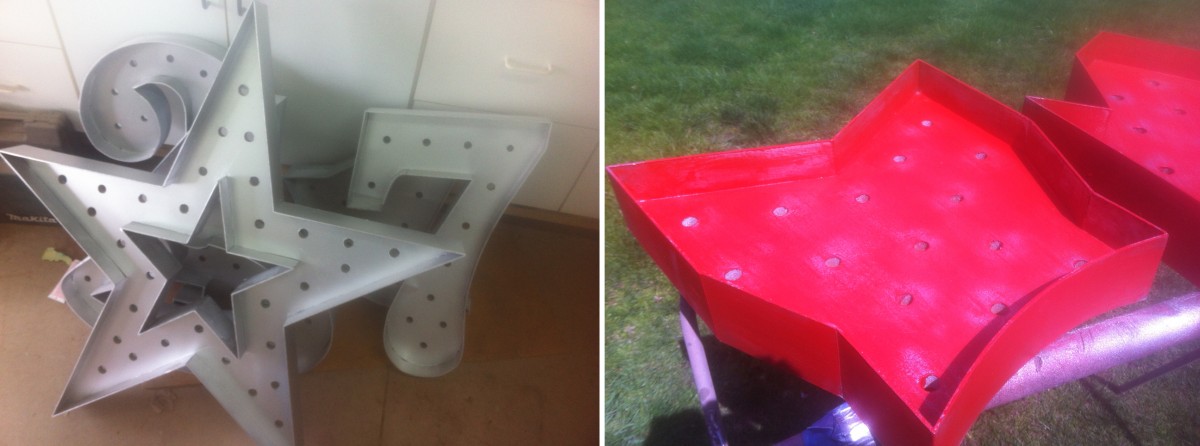
Although our sign was made from wood, we were able to mimic the look of the vintage, metal signs by using various painting techniques. After a few coats of primer, the entire sign was sprayed with a metallic silver spray paint.
The individual pieces were then painted with latex paint in their own color. Using a combination of scraping and sanding, Justin then distressed the pieces, paying special attention to the areas that would realistically have received the most wear (edges, around the bulb sockets, etc.).
Adding Bulbs
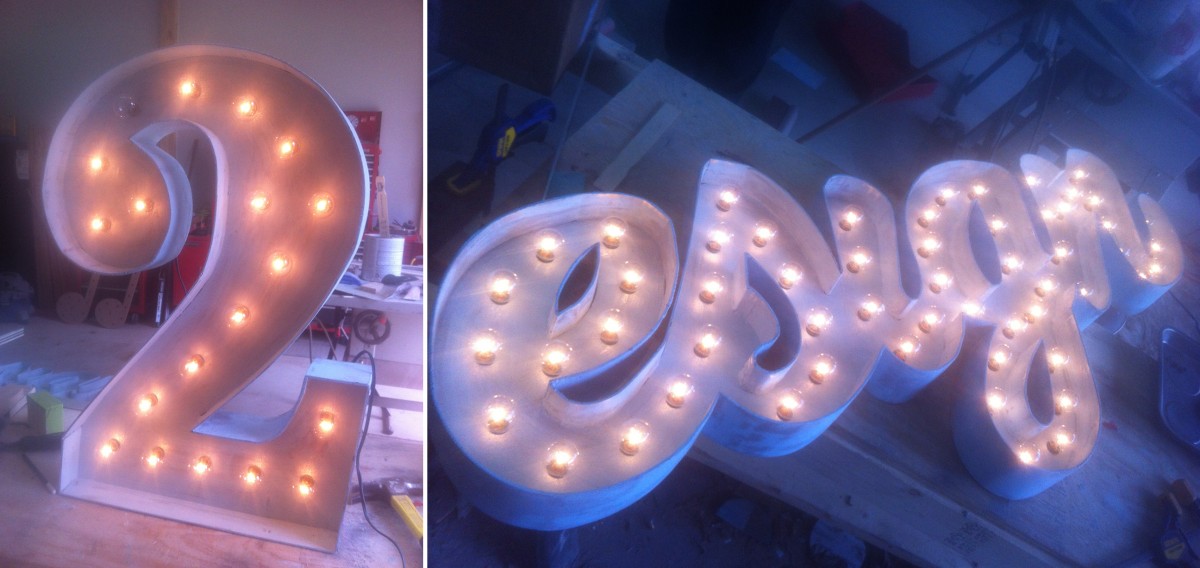
Turning a string of lights into a lighted marquee sign was no small task. Each bulb had to be removed from its string while the wires were wound around the back of each part of the sign. After the sockets were placed into their corresponding holes, the bulbs were screwed back in, one at a time.
We even used a vintage glass-dying kit to tint some of the bulbs — yellow for the star, and a few random red and blue bulbs to give it a used, vintage look.
Hanging the Sign
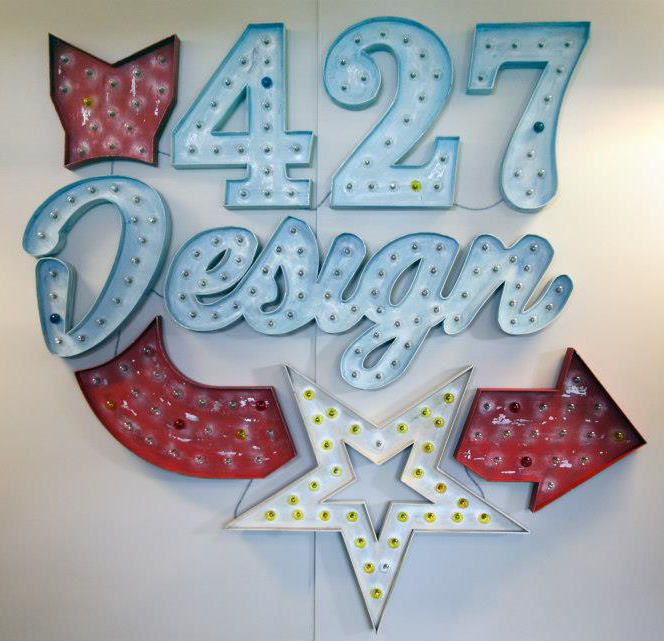
After everything was cut, sanded, painted and wired, the sign was ready to be transported from Justin’s shop to the office. We decided that it demanded space of its own, so we cleared off a central wall near our sitting area. Hanging such a large sign was a challenge, but with a few helping hands, a lot of picture hanging wire and a few monkey hooks, we got it up and secure a few days before the Open House.
We’re so incredibly happy with the way the sign turned out. The first time we lit all 209, 5-watt bulbs — for a total of 1045 watts — we were in awe (we might have also melted the first dimmer we attached to it). It’s definitely transformed our space (and maybe our electric bill too) and will surely be the highlight of our office for as long as we’re in this space.
If you weren’t able to make it to the Open House this year, you can read more about what you missed here, or check out our photo album on Facebook. If you’d like to see the sign in person, stop by — we’d love to show it to you!
Sorry, comments for this entry are closed at this time.